- Claerhout Aluminium NV
- Blokkestraat 2
- 8530 Harelbeke
- Belgium
- Tel: +32 56 35 15 56
- info@claerhoutaluminium.be
- VAT BE 0423.092.224

Discover our full range of
aluminium products
Discover our full range of
aluminium products
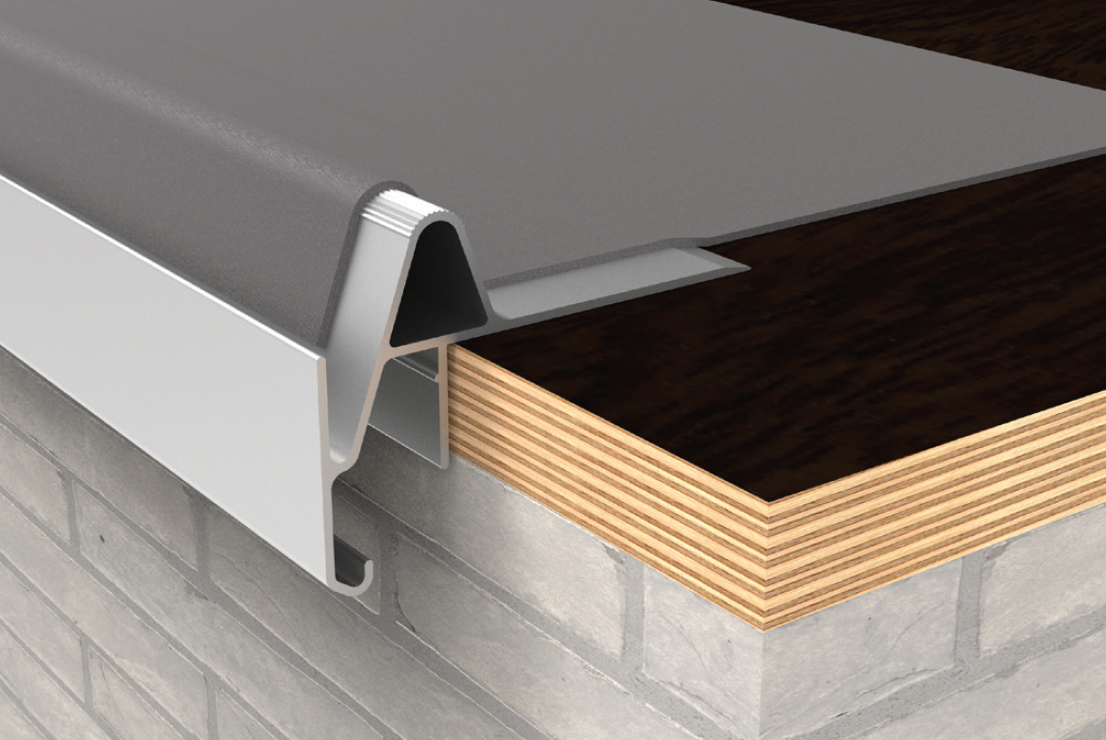
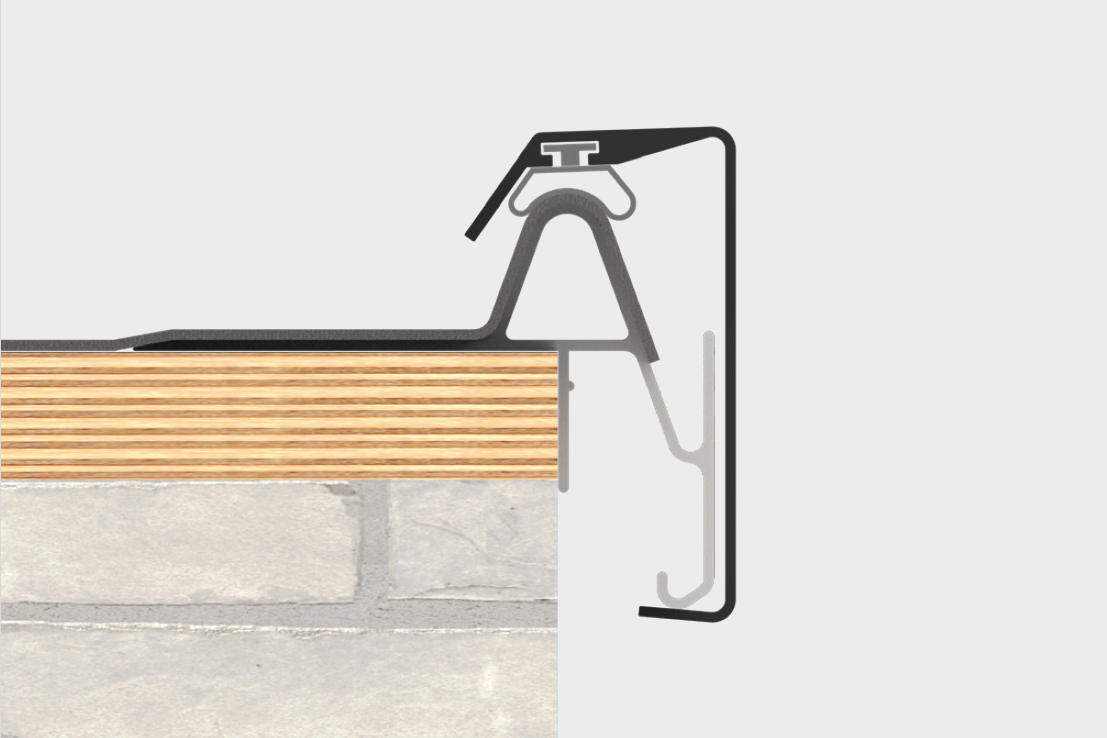
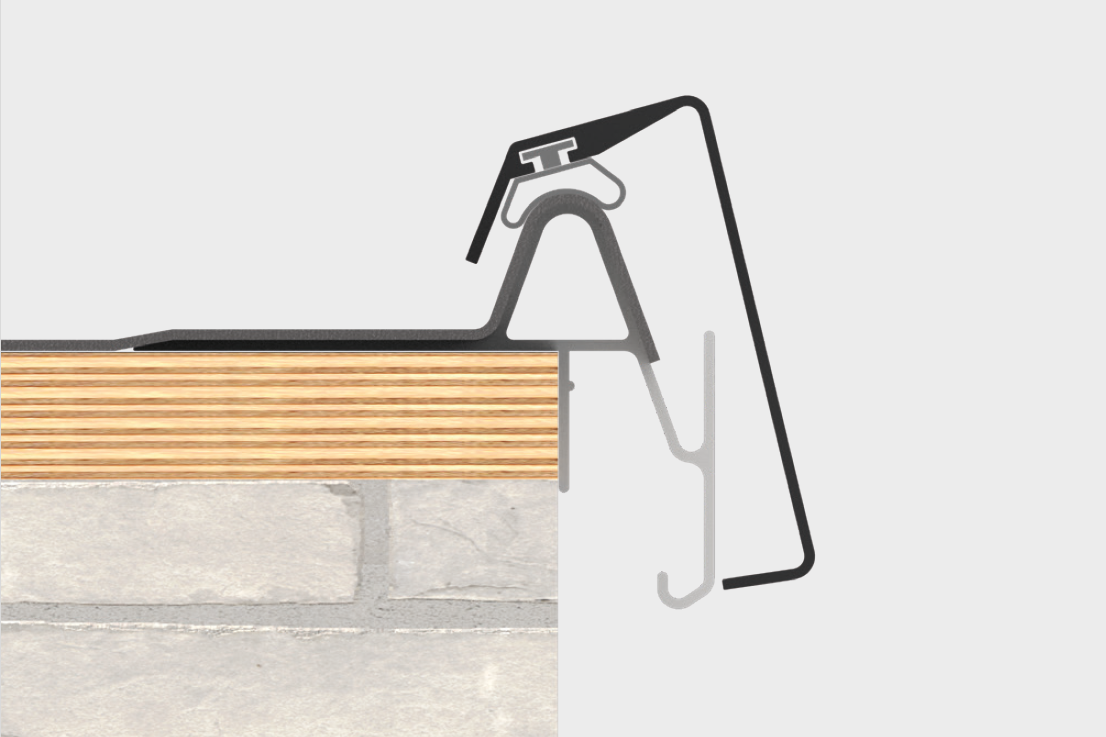
The Clips&Go 2.0 roof edge system consists of only 2 parts: the base profile and the moulding. The base profile provides the roof edge with a watertight finish. The moulding can then be clipped to the base profile in the required colour.
The base profile is provided with pre-punched, 6 x 16 mm oval holes and a front stop. In addition, the membrane's direct connection to the roof edge means huge savings in membrane accessories.
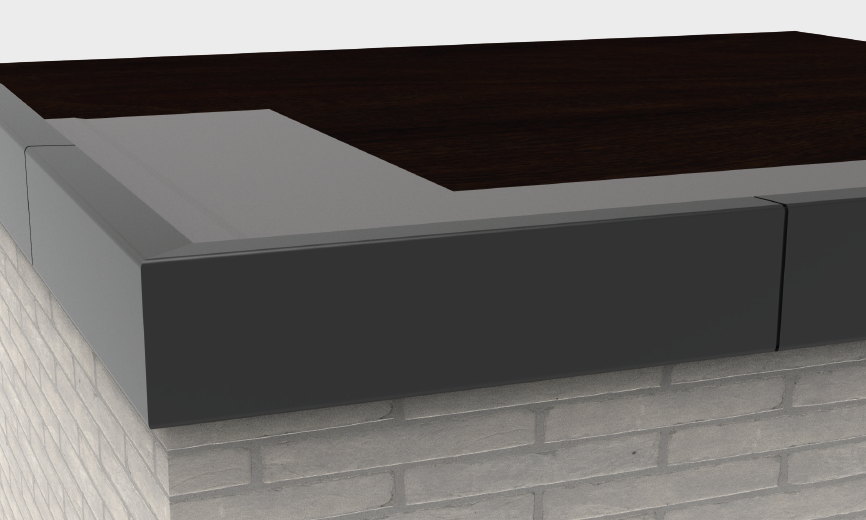
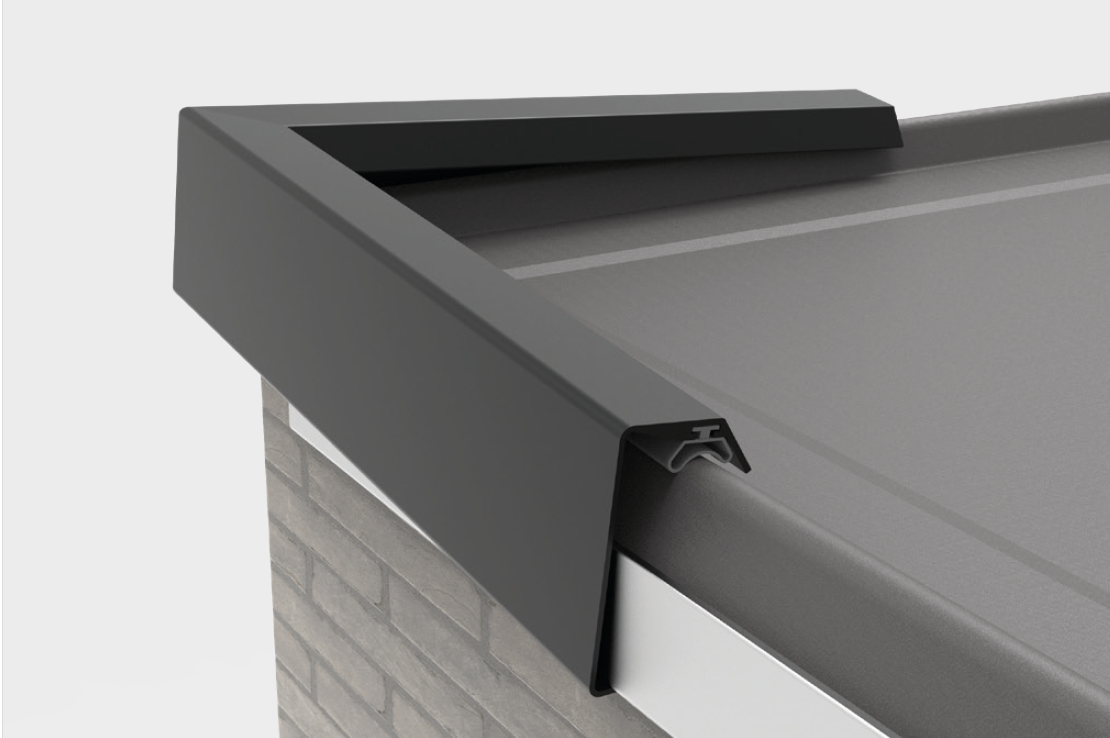
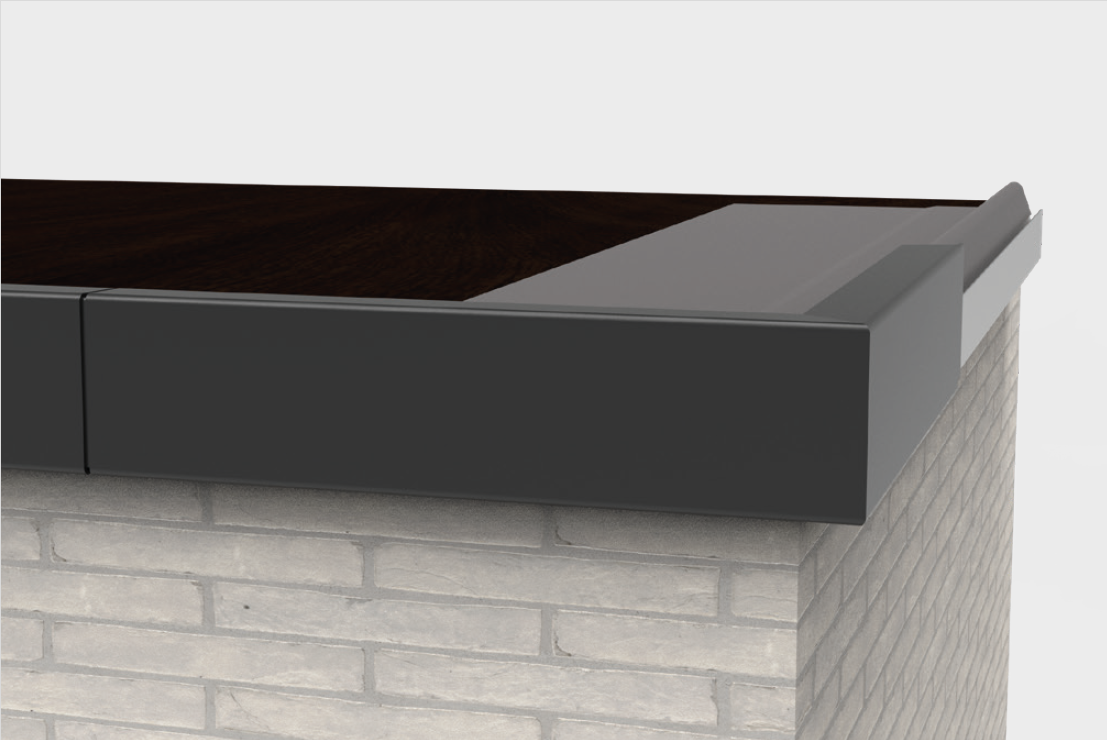
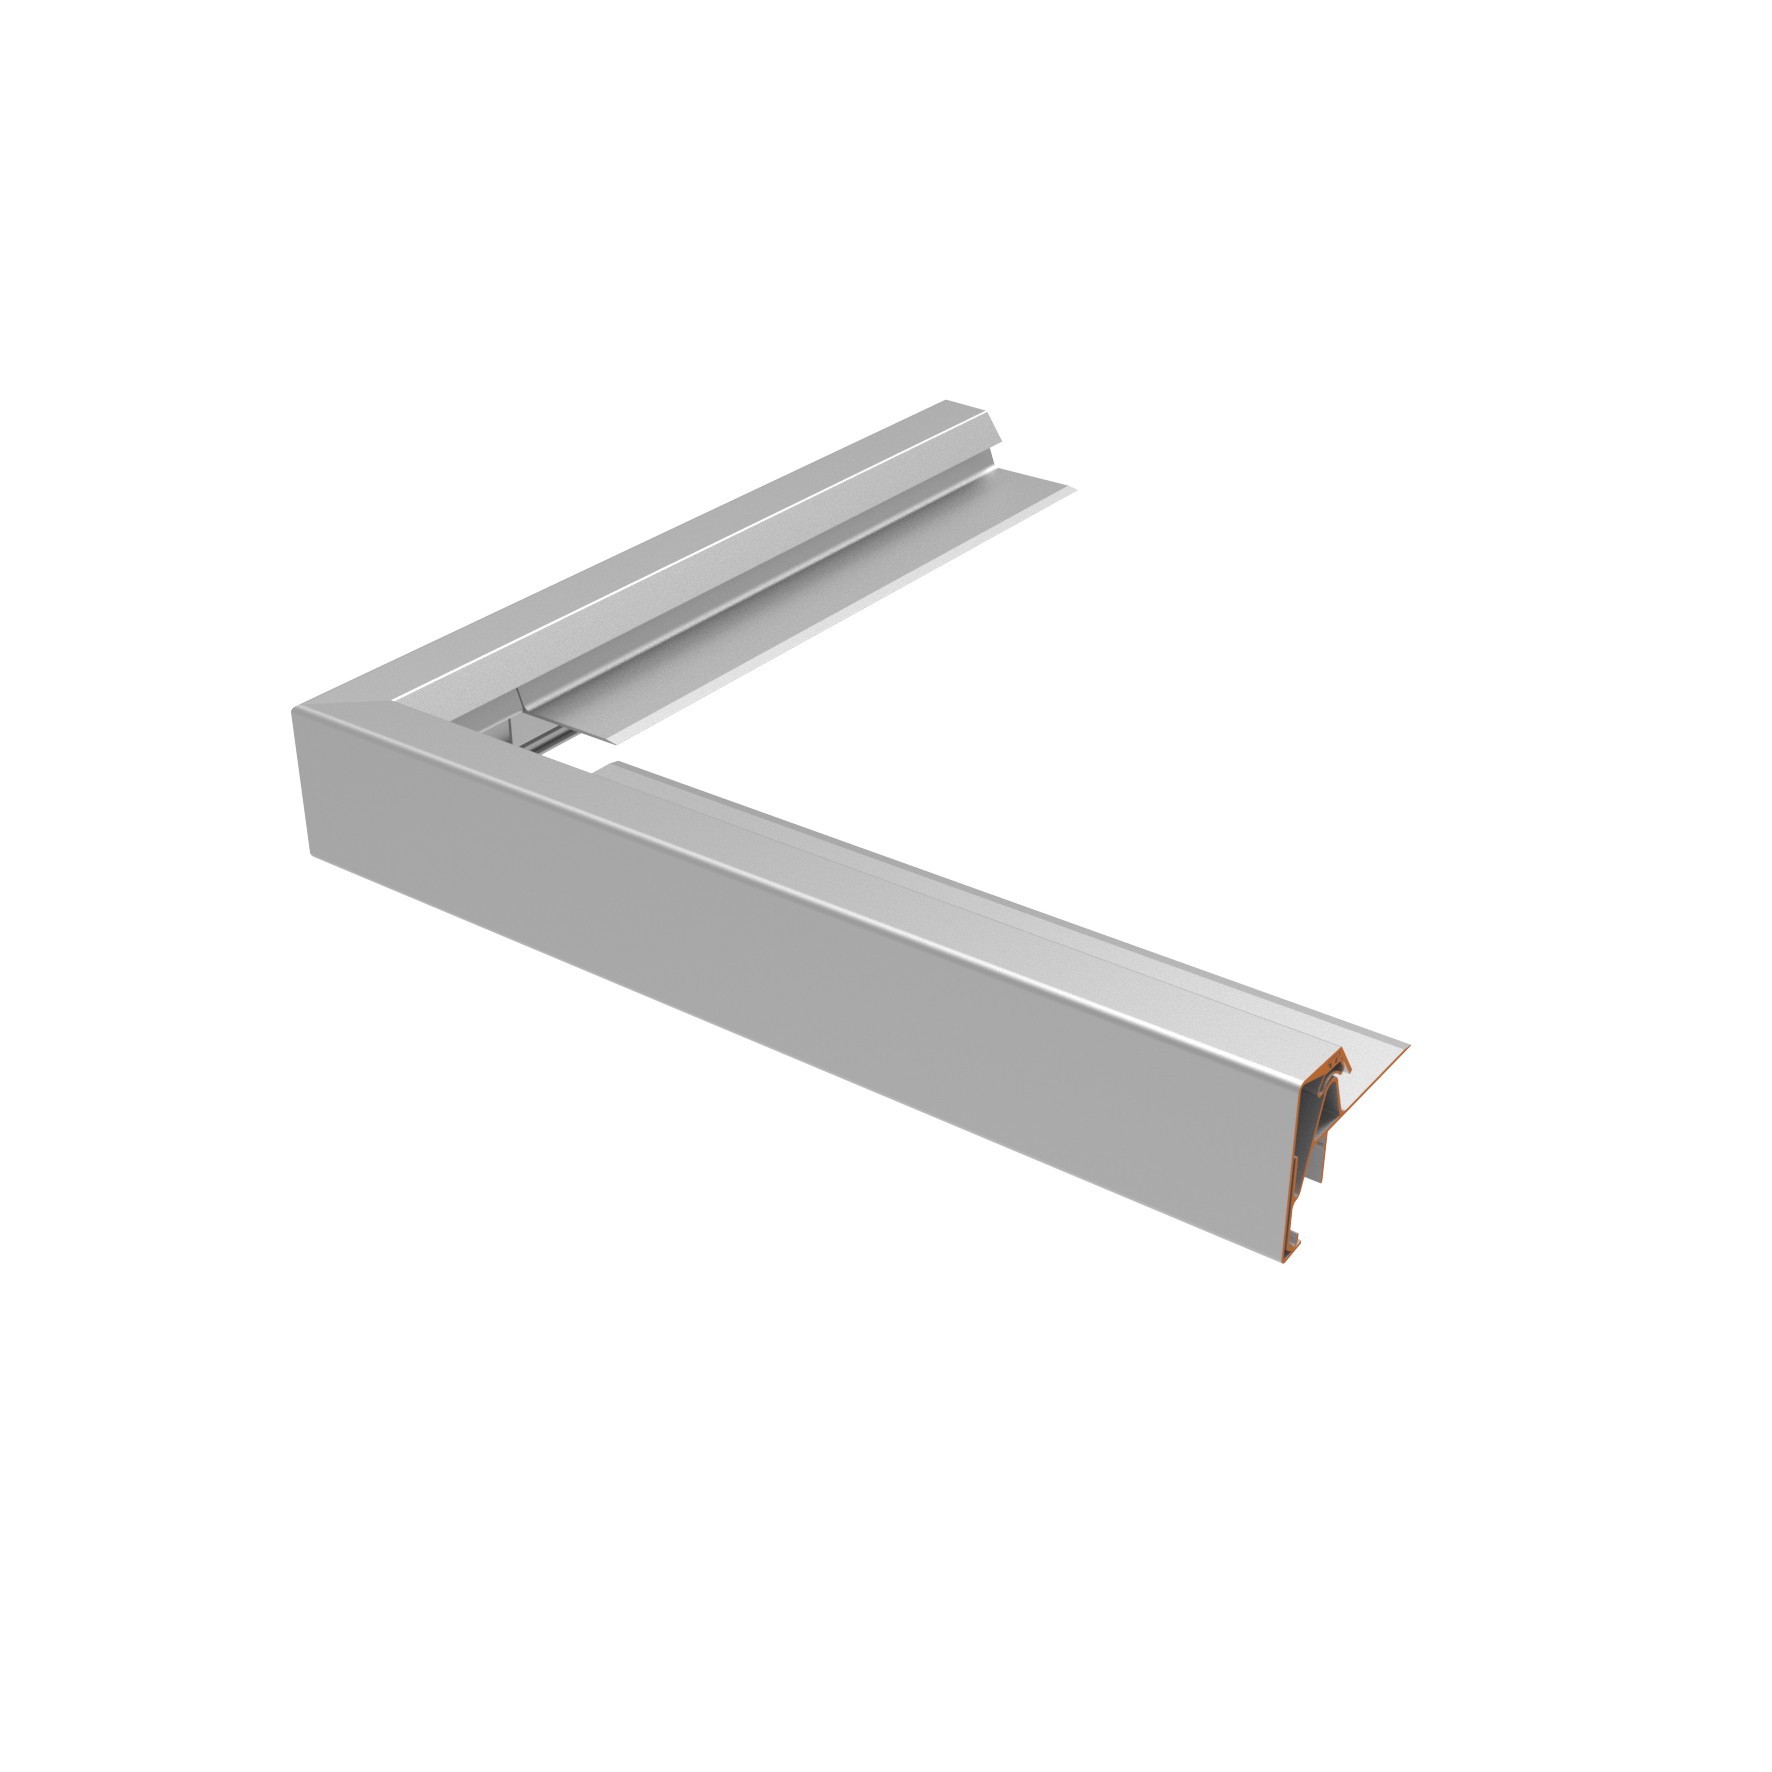
Practical accessories are provided to create the inside and outside corners. The 'easy corner' accessory is slid into the base profile at the corners for a seamless connection. This means that there is no need to saw into the corners, so you will not need a mitre saw. After the roof edge with the base profile is made watertight, the moulding is clipped onto the base profile. The stove-enamelled aluminium moulding is provided with rot-resistant thermoplastic rubber to ensure an optimum clamping of the roof covering.
The base profile and the roof edge are directly connected to each other, thus reducing the risk of leakage, breakage or damage to the surface or wall. The 50 mm long joint clips provide a watertight finish to the joints.
The patented Clips&Go 2-piece roof edge system is suitable for all EPDM membranes with a thickness of 1.2 mm to a maximum of 2.5 mm and for overlaps with a maximum 2-layer thickness.
